
Best Studio Monitors For Home
Choosing the right studio monitors is crucial for achieving accurate sound reproduction in a home recording environment. Unlike regular speakers, studio monitors are designed to deliver a flat frequency response, revealing every detail in your audio mix. With a wide array of options available, selecting the best model can be overwhelming for both beginners and experienced producers.
This guide highlights top-performing studio monitors tailored for home use, balancing sound precision, build quality, and value. From compact near-field monitors to advanced models with room correction, these recommendations cater to various budgets and studio setups, ensuring clarity and reliability for music production, podcasting, and mixing tasks.
Best Studio Monitors for Home: Choosing the Right Monitors for Your Setup
Selecting the best studio monitors for home use involves balancing sound accuracy, room size compatibility, and budget.
 Yamaha Studio Monitor Headphones
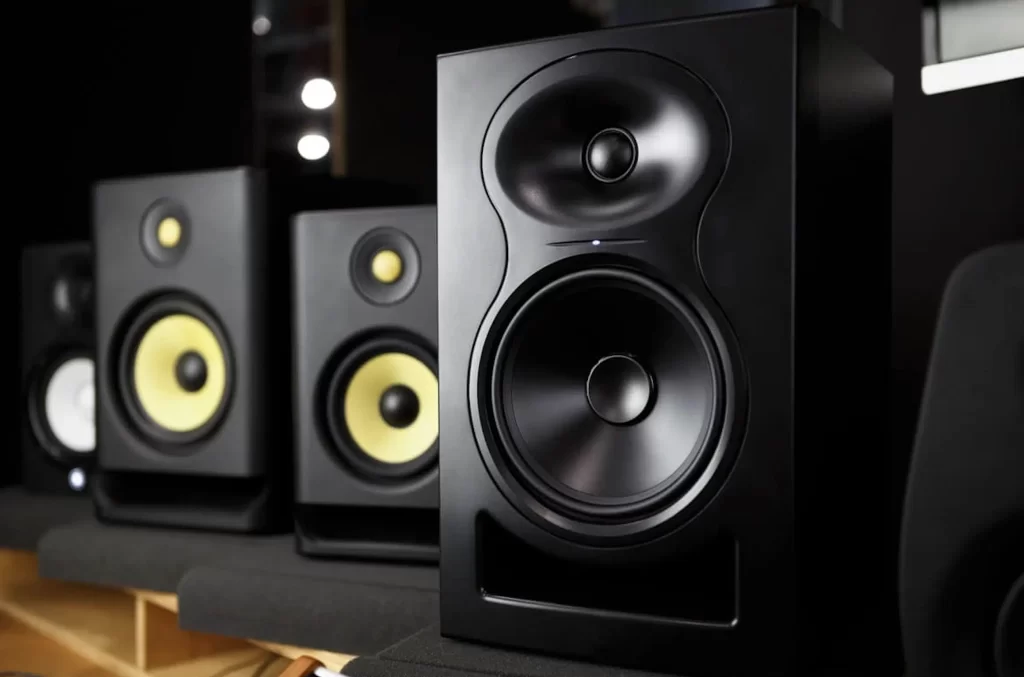
Unlike regular speakers designed for music enjoyment, studio monitors are built for flat frequency response, ensuring you hear audio exactly as it was recorded—without coloration or enhancement. This precision is essential for tasks such as music production, podcasting, mixing, and mastering, where even subtle audio imbalances can affect the final output.
When selecting monitors for a home environment, it's crucial to consider factors like room acoustics, speaker size, power output, and connectivity options. Near-field monitors are often preferred in home studios due to their compact size and focused sound projection, minimizing room reflections.
Additionally, features like built-in amplification, balanced inputs (XLR and TRS), and room correction technologies can significantly improve performance in less-than-ideal acoustic spaces. Ultimately, the best home studio monitors deliver clarity and consistency, helping creators make informed decisions during audio editing.
Top Recommended Studio Monitors for Home Use
Some of the most widely praised studio monitors for home setups include the Yamaha HS8, known for its neutral, transparent sound and excellent low-end extension, making it a favorite among professional and home producers alike.
 Sterling Mx5 Studio Monitors
The KRK Rokit 5 G4 offers powerful bass response thanks to its front-firing port and built-in graphic EQ for room tuning, ideal for small to medium-sized rooms. The ADAM Audio T7V stands out with its U-ART ribbon tweeter, providing exceptional high-frequency detail, while the PreSonus Eris E5 XT features acoustic tuning controls and broad connectivity, including Bluetooth.
For budget-conscious creators, the JBL 305P MkII delivers impressive accuracy and a wide sweet spot, making it one of the best value options in the entry-to-mid range tier. Each of these models brings unique strengths that cater to different production needs and room types, ensuring a precise audio monitoring experience at home.
Key Features to Consider in Home Studio Monitors
When evaluating studio monitors for home use, several technical and practical features should influence your decision. First, look at the driver configuration: most monitors feature a two-way design with separate tweeters and woofers; larger drivers (like 6.5” or 8”) produce better bass, but require more space.
Amplifier power—especially bi-amping, where each driver has its own amp—improves clarity and dynamics. Connectivity options such as XLR, TRS, and RCA inputs offer flexibility in linking to audio interfaces, mixers, or media players. The inclusion of room tuning controls (e.g., low-cut filters, high-frequency trims) allows you to compensate for poor room acoustics.
 Studio Monitor Bluetooth
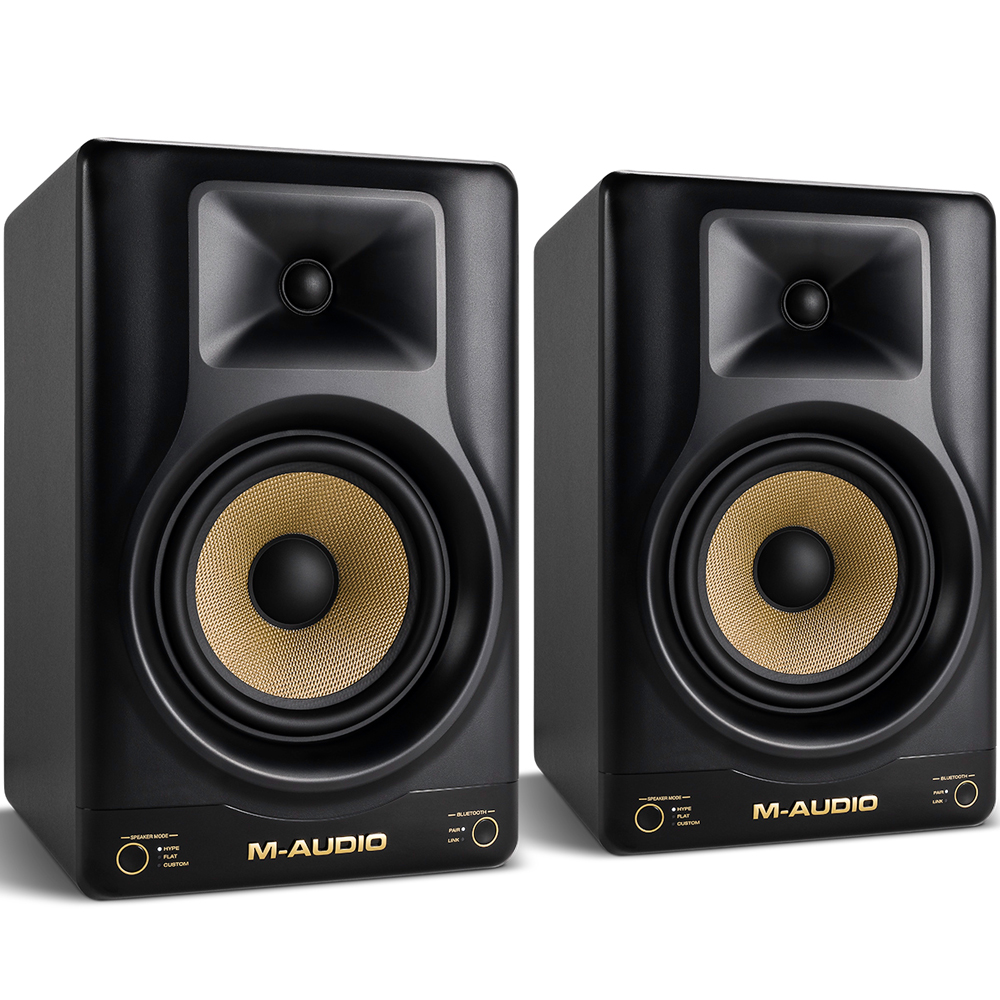
Other important aspects include frequency response range (aim for 40Hz–20kHz for full-spectrum accuracy), cabinet design that minimizes resonance, and the presence of acoustic boundary compensation to adjust for placement near walls. Investing in monitors with these features ensures better sound reproduction regardless of room limitations.
How Room Size and Acoustics Affect Monitor Performance
The performance of home studio monitors is significantly influenced by room size and acoustic properties. In smaller spaces, sound waves reflect off walls, ceilings, and furniture, causing issues like standing waves, comb filtering, and bass buildup, especially in corners or near boundaries.
Placing monitors too close to walls can exaggerate low frequencies, making mixes sound boomy—an inaccurate representation that leads to poor mixing decisions. To mitigate these issues, it's recommended to position monitors at ear level, forming an equilateral triangle with the listening position, and use acoustic treatment such as bass traps, foam panels, and diffusers.
The monitor size should match your room: 5-inch woofers work well in small rooms, while 8-inch models are better suited for larger, acoustically treated spaces. Additionally, using isolation pads can reduce vibrations transmitted to your desk or stand, preserving sound clarity. Proper room integration ensures that your monitors deliver the faithful audio reproduction they’re designed for.
 Studio Monitor Comparison
| Monitor Model | Driver Size | Frequency Response | Key Features |
|---|---|---|---|
| Yamaha HS8 | 8-inch woofer | 38 Hz – 30 kHz | Neutral sound, large sweet spot, ported bass |
| KRK Rokit 5 G4 | 5-inch woofer | 45 Hz – 40 kHz | Front-firing port, 3-band EQ, bright high end |
| ADAM Audio T7V | 7-inch woofer | 39 Hz – 50 kHz | U-ART ribbon tweeter, excellent detail |
| PreSonus Eris E5 XT | 5.25-inch woofer | 55 Hz – 22 kHz | Bluetooth, extensive room tuning, versatile I/O |
| JBL 305P MkII | 5-inch woofer | 47 Hz – 20 kHz | Waveguide tech for wide sweet spot, great value |
Best Studio Monitors for Home Studios: A Comprehensive Buyer’s Guide
What are the top studio monitors for a home setup?
Top Studio Monitors for Home Recording and Mixing
For home studio setups, having accurate and reliable studio monitors is crucial for achieving professional-quality sound. The best options combine clear frequency response, balanced audio output, and compact designs suitable for smaller rooms.
Among the most recommended models are the Yamaha HS5 and HS8, known for their flat response and studio-standard reliability. The KRK Rokit 5 and Rokit 8 are also popular due to their enhanced bass and built-in optimization features for different room acoustics.
Additionally, the Adam Audio T7V delivers exceptional clarity with its U-ART ribbon tweeter, making it ideal for detailed mixing. Other strong contenders include the JBL 305P MKII, which offers impressive imaging and DSP tuning, and the Neumann KH 120, a premium option with transparent sound for critical listening. These monitors stand out due to their consistent performance, connectivity options, and adaptability in various home environments.
- Yamaha HS5 – Known for accurate sound reproduction and reliability in home studios
- KRK Rokit 5 – Features a front-firing bass port and room-tuning controls for flexibility
- Adam Audio T7V – Offers extended high-frequency response thanks to its unique tweeter design
Key Features to Consider When Choosing Studio Monitors
Selecting the right studio monitors for a home setup involves evaluating several technical and practical aspects. Frequency response is essential because it determines how faithfully the monitor reproduces sound across lows, mids, and highs.
 Studio Monitor Earphones
A flat response is preferable for accurate mixing. Driver size affects bass performance and overall volume—5-inch and 8-inch woofers are the most common choices for home studios. Connectivity options such as XLR, TRS, and RCA inputs offer flexibility depending on your audio interface.
Room calibration features, like those found in the KRK and JBL models, help compensate for acoustic irregularities in untreated spaces. Power output and sensitivity influence volume capability and clarity at different listening levels. It's also important to consider the monitor’s placement and whether it requires isolation pads or stands to reduce vibrations and improve sound precision.
- Frequency response – Look for flat and neutral sound profiles for authentic audio reproduction
- Driver size – 5-inch or 8-inch drivers suit most home studios, balancing space and sound quality
- Connectivity – XLR and TRS inputs ensure compatibility with professional audio gear
Affordable Yet High-Performing Studio Monitors for Beginners
Starting a home studio doesn’t require breaking the bank, as several affordable monitors deliver professional-level sound quality.
The PreSonus Eris E4.5 and E5 offer high-value performance with built-in acoustic tuning to adapt to various room settings. Powered by Class A/B amplification, they provide clear audio with minimal distortion. Another excellent budget-friendly choice is the Kali Audio LP-6, praised for its remarkable imaging and frequency accuracy despite its price point.
 Studio Monitor Placement Diagram
The Behringer Neutron TM15S is also gaining popularity for its robust build and surprisingly articulate sound. These options make it possible for beginners and hobbyists to create mixes that translate well across different playback systems. While they may lack the refined detail of high-end monitors, they provide essential features like diverse input options, volume controls, and acoustic adjustment filters.
- PreSonus Eris E5 – Includes adjustable high and mid-frequency controls for room optimization
- Kali Audio LP-6 – Delivers precise stereo imaging and wide frequency response on a budget
- Behringer Neutron TM15S – Combines modern design with powerful performance at an entry-level price
What does the 38 rule mean for choosing the best studio monitors for home use?

Understanding the 38 Rule in Studio Monitor Placement
- The 38 rule refers to an acoustic guideline used to optimize speaker and listening position within a room to minimize standing waves and early reflections. It suggests that the listening position should be located at 38% of the room’s length from the front wall. This percentage helps place the listener outside the primary reflection zones where low-frequency pressure nodes and anti-nodes tend to form.
- By applying the 38 rule, users aim to achieve a more neutral and accurate sound reproduction, which is essential for critical mixing and mastering tasks in a home studio environment. The rule is derived from room mode calculations and aims to reduce bass buildup caused by room dimensions, especially in untreated or modestly treated spaces.
- This method works best in rectangular rooms where measurements can be precisely calculated. The rule is not a strict law but rather a starting point for setting up monitors and the listening position. It can be combined with acoustic measurement tools and room treatment for better results.
How the 38 Rule Improves Sound Accuracy at Home
- Implementing the 38 rule can significantly enhance the low-mid and bass frequency response in a home studio. When the listener sits at 38% of the room length, they are less likely to encounter destructive interference patterns that cause frequency cancellation or boomy bass, common in untreated rooms.
- This positioning helps in achieving a smoother frequency response, which leads to more trustworthy monitoring. Accurate monitoring is critical when making mixing decisions such as EQ adjustments, panning, and level balancing, especially in non-professional environments where full acoustic treatment may not be possible.
- Additionally, the 38 rule can serve as a foundation before investing in more advanced acoustic treatments or measurement microphones. It provides an accessible, no-cost method to improve sound quality simply by repositioning the listening spot and speakers symmetrically from side walls.
Practical Steps to Apply the 38 Rule at Home
- First, measure the total length of your room from the front wall (where the speakers will face) to the back wall. Multiply this length by 0.38 to determine the optimal distance from the front wall where your listening position (ear level) should be placed.
- Once the position is marked, align your studio chairs or seating so that your ears sit exactly at that point. Then, position your studio monitors at an equal distance from the side walls and angled inward to form an equilateral triangle with your head at the apex for optimal stereo imaging.
- After placement, play reference tracks you know well to evaluate the bass response and stereo field. Fine-tune the position slightly if needed, considering factors such as room furnishings, wall materials, or ceiling height that may affect the final sound, even when following the 38 rule.
How Many Studio Monitors Do You Need for a Home Setup?
The number of studio monitors you need for a home setup typically depends on your audio production goals, room size, and the type of work you're doing. For most home recording and mixing applications, a stereo pair of two studio monitors is standard and sufficient.
This two-monitor setup enables accurate stereo imaging, allowing you to hear the spatial positioning of sounds in your mix. However, more advanced setups—such as those used for surround sound mixing, film scoring, or immersive audio production—may require additional monitors. Ultimately, the quality of the monitors and the acoustic treatment of the room are often more important than the quantity.
 Studio Monitor Setup Diagram
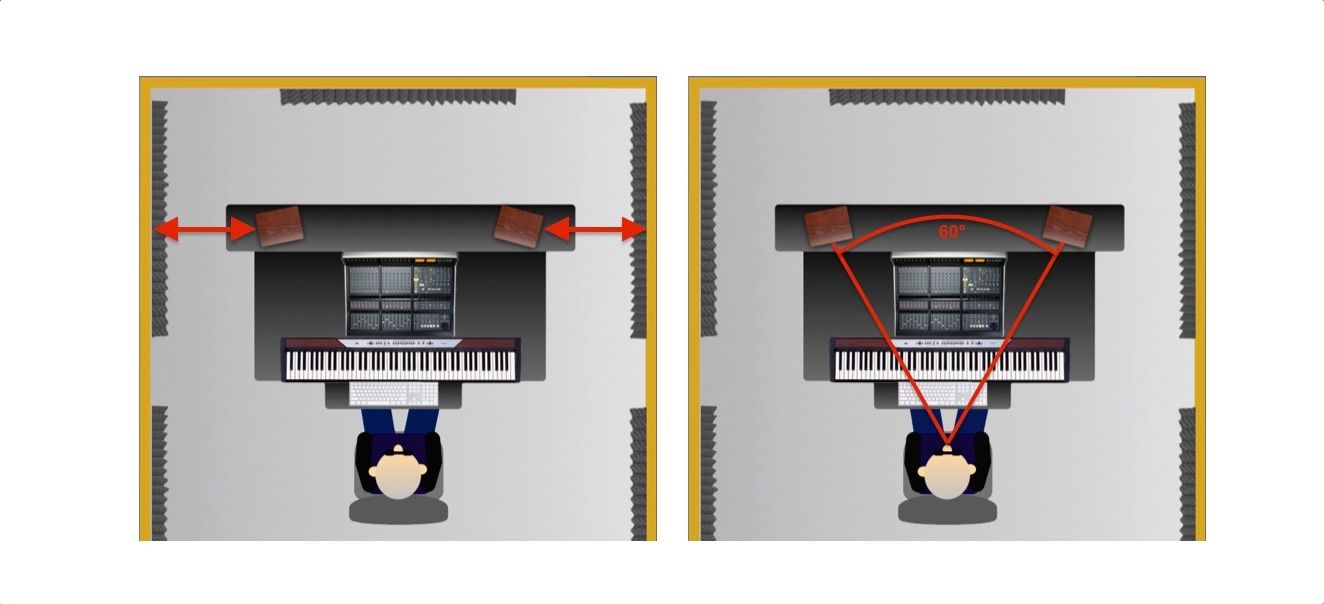
Standard Stereo Monitoring (2 Monitors)
- A pair of studio monitors is the foundation of nearly every home studio. This stereo setup allows for accurate left-right panning, essential for music production, podcast mixing, and basic audio editing.
- When placing two monitors, it's critical to form an equilateral triangle with your listening position: both monitors should be angled inward toward your head, placed at ear level, and spaced symmetrically to ensure balanced sound.
- Many acclaimed home studios operate successfully with just two high-quality monitors paired with proper acoustic treatment, showing that two well-chosen monitors are often all you need for professional results.
Surround Sound and 5.1/7.1 Setups (5–7 Monitors)
- For creators working in film, television, or game audio, a surround sound configuration such as 5.1 or 7.1 may be necessary. These setups include five or seven speakers respectively, plus a subwoofer for low-frequency effects.
- A typical 5.1 arrangement includes three front monitors (left, center, and right), two surround monitors (left and right), and one subwoofer. This enables accurate spatial soundstage reproduction for immersive media.
- While impressive, surround setups demand more space, complex calibration, and specialized audio interfaces, making them less common in smaller home environments unless specifically required by the workflow.
Expanded Monitoring for Reference (3+ Monitors)
- Some audio engineers use three or more monitors to reference their mixes on different systems. This includes adding near-field, mid-field, or even consumer-grade speakers to simulate how audio will sound on various playback devices.
- A third monitor, such as a single full-range or alternative design speaker, can help assess translation across systems. This is useful for ensuring mixes sound good on phones, laptops, car stereos, etc.
- Using multiple sets of monitors requires an A/B switching system or a monitoring controller to easily toggle between them, helping streamline workflow while avoiding inconsistencies due to level or positioning differences.
What are the drawbacks of using studio monitors in a home setup?
Volume Limitations and Disturbance to Others
- Studio monitors are designed to deliver accurate sound across the frequency spectrum, which often requires higher volume levels during mixing or critical listening. In a home environment, this can easily lead to sound spilling into adjacent rooms or neighboring dwellings, especially in apartments or townhouses with thin walls.
- Even at moderate levels, the clarity and bass response of studio monitors can be more intrusive than regular consumer speakers, potentially disturbing family members, roommates, or neighbors who are not involved in audio work.
- Users may need to limit their listening or working hours to avoid complaints, which constrains flexibility and productivity, particularly for those who prefer late-night or early-morning creative sessions.
Room Acoustics and Sound Accuracy Issues
- Studio monitors are highly sensitive to room acoustics and require a treated environment to perform optimally. Most home setups lack proper acoustic treatment such as bass traps, diffusion panels, or sound-absorbing materials, leading to inaccurate sound reproduction.
- Reflections from walls, furniture, and untreated surfaces can create standing waves, comb filtering, and bass buildup, which distort the audio signal and make mixing decisions unreliable.
- Without ideal placement and room calibration, users may perceive false imbalances in frequency response, resulting in mixes that do not translate well to other playback systems.
Space and Aesthetic Considerations
- Studio monitors are typically larger and more obtrusive than typical home audio speakers, requiring dedicated desk space or stands, which can be challenging in smaller living areas or multi-purpose rooms.
- Their professional appearance may not blend well with home decor, making them unsuitable for shared living spaces where aesthetics are prioritized over audio performance.
- Proper monitor placement for optimal stereo imaging—such as forming an equilateral triangle with the listening position—often conflicts with comfortable furniture arrangements or room layout limitations, reducing both ergonomic and acoustic feasibility.
Frequently Asked Questions
What should I look for when choosing the best studio monitors for home use?
When selecting studio monitors for home, prioritize accurate sound reproduction, suitable size for your room, and balanced frequency response. Look for models with good bass extension and clear mids/highs. Consider connectivity options like XLR, TRS, or RCA. Room calibration features or built-in EQ can help adapt sound to your space. Choose monitors with a flat response to ensure honest audio monitoring for mixing and editing tasks.
Are active studio monitors better than passive ones for home studios?
Yes, active studio monitors are generally better for home studios because they have built-in amplifiers tailored to each driver, ensuring optimal performance. They require less additional equipment, saving space and simplifying setup. Passive monitors need an external amplifier, increasing cost and complexity. Active models offer easier calibration and balanced sound, making them ideal for beginners and professionals working in limited home environments.
How important is room size when selecting home studio monitors?
Room size is crucial when choosing studio monitors because it affects sound accuracy and bass response. Larger rooms can accommodate bigger monitors and handle low frequencies better, while small rooms may cause bass buildup. Select monitors that match your room’s dimensions to avoid sound distortion. Near-field monitors are ideal for small home studios, providing clear audio at close distances without overwhelming the space.
 Studio Monitor Switch Box
Can I use regular speakers instead of studio monitors at home?
Regular speakers are not ideal for home studios because they enhance sound frequencies to make music more enjoyable, which leads to inaccurate mixing. Studio monitors provide a flat, uncolored response, revealing every detail in your audio. This accuracy is essential for producing balanced tracks. While regular speakers are fine for casual listening, studio monitors are necessary for recording, editing, and mixing music professionally at home.
Leave a Reply